Building a Stylized Grass System
I built a grass system during my exchange here in the Netherlands. Here are some notes on how the features were built, things I learned and also some quirks in Unity that I came across (shocker). The source files can be found on Github.

URP | 2021 LTS Quick overview of the features:
- Editor tools for "painting" instance points for grass on surfaces
- Chunk based culling and serialization system for these points
- Rendering technique only requiring one draw call
- Shader (ShaderLab)
- Wind Sway
- Cel shading
- Main & Additional light support
- Billboarding
- Sphere based interactions with objects
Contents:
Placement
I created a "painting" tool with the EditorTool attribute. Left mouse to paint and right mouse to erase. The painting feature itself is pretty simple, It's just a raycast with the ray from mouse's screen position converted to a ray in the OnToolGUI() callback of the EditorTool. From GrassDrawTool.cs (modified for readability):
private void OnToolGUI()
{
	Event e = Event.current;

	// Left click or drag
	if ((e.type == EventType.MouseDown || e.type == EventType.MouseDrag) && e.button == 0)
	{
		Ray ray = HandleUtility.GUIPointToWorldRay(e.mousePosition);

		if (Physics.Raycast(ray, out RaycastHit hit))
		{
			// The funny stuff I talk about next
			GenerateMultipleInstancePoints(hit.point);
		}
	}
}
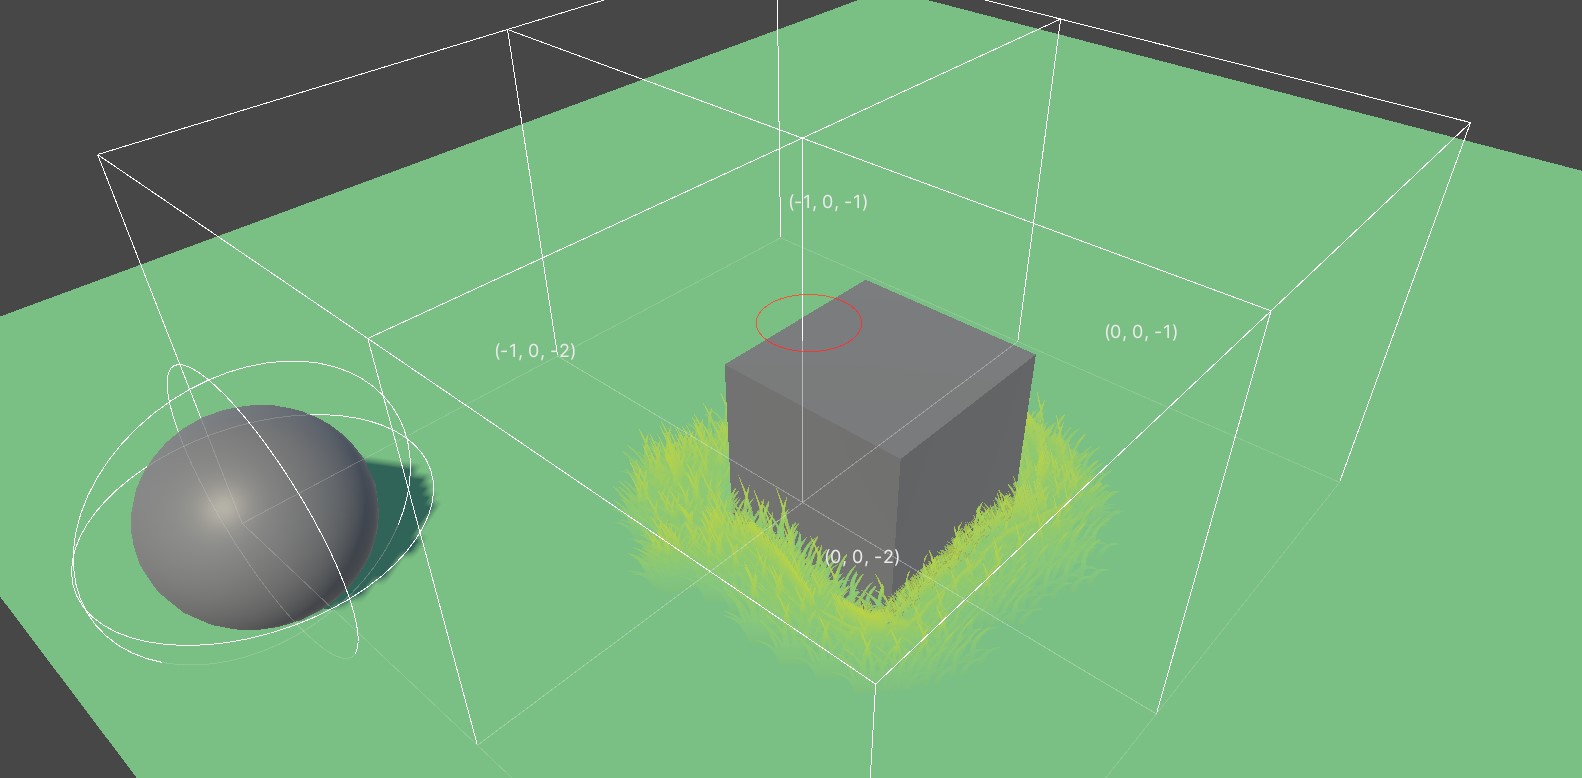
But the interesting part is in the generation of the points in a evenly random pattern for which I'm using Poisson disc sampling (great visualization). Usually in Poisson disc sampling the generated points act as new "roots" where new points are generated and tested for the specified minimum distance to others. I tried this method first but the recursive nature made it too heavy to run each frame during the stroke of the brush. I found that the performance improved radically if I ditched the recursiveness altogether and only sample points around the raycast hit. Another consideration had to be limiting the points given for the Poisson sampling distance checks as giving all the millions of points in a field for example would take seconds to go through each frame. To fix this I only fed the algorithm the adjacent chunks from my culling system which is up next.
Custom Frustum Culling
I first had a compute shader individually culling every point but after seeing a beautiful chunk based approach on a video by MinionsArt I changed course mainly because it meant I could get rid of the overhead that comes from transferring data between CPU and GPU. I ended up with a ScriptableObject that holds the instance points in these chunks. This is implemented with a Dictionary<Vector3Int, List<Vector3>>, but this has the drawback of not having serialization support. I tried the trick of getting away with generics as mentioned in this forum thread, also tried the same with the SerializedDictionary from UnityEngine.Rendering, but no luck (maybe just a skill issue). At the end I just settled with an array of points (Vector3[]) and an array of objects mapping the points to their respective chunks (ChunkMap[]). The actual frustum plane tests are done using GeometryUtility.CalculateFrustumPlanes(camera) and GeometryUtility.TestPlanesAABB(frustumPlanes, chunkBounds). Culling can be found in GetVisiblePoints() of InstancePointData.cs.
Procedural Rendering
RenderPrimitives & ExecuteAlways
I used RenderPrimitives to render in Update and ExecuteAlways attribute to extend this rendering to the edit mode. I thought this was going to be easy-breezy but I spent way too much time trying to figure out why the buffers keep leaking memory when entering and exiting playmode.
Some trouble with disposing the GraphicsBuffers when using ExecuteAlways attribute Working with ExecuteAlways caused me some headache when it came to disposing buffers upon entering and exiting playmode. First I just had the GraphicsBuffer.Release() calls in OnDestroy() but this kept causing memory leaks. Snippet from Grass.cs modified for readability:
private void OnDestroy() // => OnDisable()
{
	instancePointsBuffer?.Release();
	instancePointsBuffer = null;
	interactorsBuffer?.Release();
	interactorsBuffer = null;
	meshTrianglesBuffer?.Release();
	meshTrianglesBuffer = null;
	meshPositionsBuffer?.Release();
	meshPositionsBuffer = null;
	meshNormalsBuffer?.Release();
	meshNormalsBuffer = null;
	meshUVsBuffer?.Release();
	meshUVsBuffer = null;
}
But then after debugging the order of the Unity callback methods, something weird came up. The OnDisable method gets called twice with the second causing the leaks. This is the order of the methods when entering playmode.
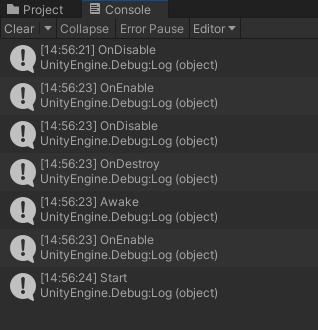
I'm not sure if this is intended behaviour because there is no mention about it in the documentation, fortunately though, everything's alright after moving the relinquishment of resources to OnDisable().
Shader Transformations
Billboard rotation
In this project I set out to understand matrix transformations finally. I've seen them and probably used also, but without having the slightest of clues what was actually going on. In this project I set out to understand matrix transformations on a level where I could use them effectively in the future. More specifically for this project I wanted to implement a billboard effect for the grass without copy-pasting anything. The transformations wouldn't end there though as I also wanted to implement some interactions between grass and other objects going through it. I had seen this before and it had my head spinning trying to figure out how it was made.
I got the billboard effect working using resources linked below by first getting the LookAt vector from the instance point towards camera and then applying it by multiplying the object space vertex position with the LookAt matrix that was formed with the vector. Applying the transformation from GrassHelpers.hlsl:
// Applies look at matrix transformation
float3 ApplyLookAtTransformation(inout float3 posOS, inout float3 normal, float3 forward)
{
    // Calculate rest of the vectors for the coordinate system of the LookAt vector
    // Use temporary up to calculate right of the LookAt coordinate system (for cross product)
    float3 right = normalize(cross(forward, float3(0, -1, 0)));
    float3 up = normalize(cross(forward, right));

    // Put together the transformation matrix of the new coordinate system that happens to
    // point straight towards our given "forward" direction
    float4x4 lookAt =
    {
        right.x, up.x, forward.x, 0,
        right.y, up.y, forward.y, 0,
        right.z, up.z, forward.z, 0,
        0, 0, 0, 1
    };

    // Transform both object space position and normal
    posOS = mul(lookAt, float4(posOS, 1)).xyz;
    normal = mul(lookAt, float4(normal, 1.0f)).xyz;
}
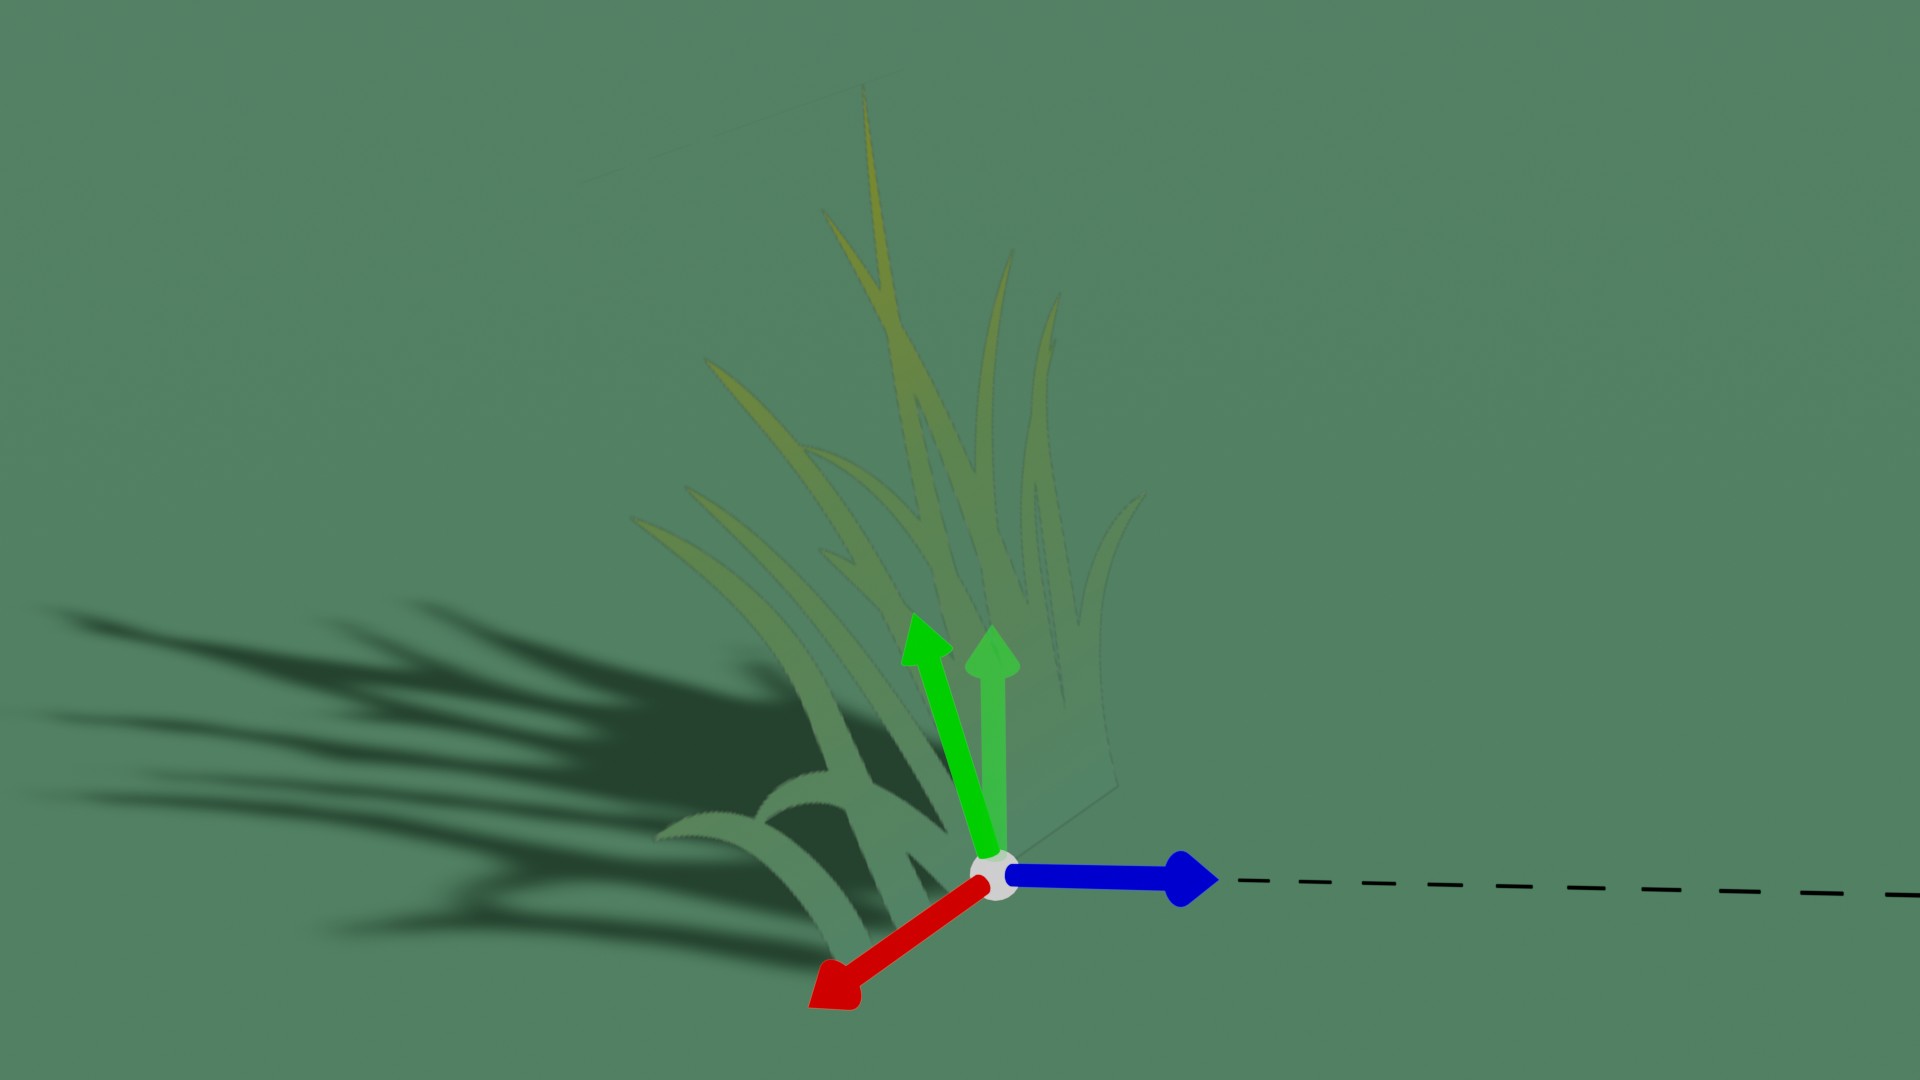
LookAt coordinate system visualized with the temporary up direction faded.
Billboard blended with rotation towards interactors
As I got the grasp of matrix transformations I started to think about implementing interactions which is just another LookAt matrix transformation, but just with some distance smoothing and other minor shenanigans getting piled on. I tried first applying the billboard effect and then piling on the interactor effect for instances that were effected by it. This quickly started sliding down toward the linear algebraic hell, so I decided to change course, which fortunately ended up being way easier than I thought. I realized I can transform a vector with both the billboard effect and the interactor after which apply the LookAt transformation only once. Ordering of effects in vertex shader from StylizedGrass.shader (modified for readability):
Varyings o;
float3 fwd = float3(0, 0, 1);

fwd = CalculateBillboardForward(instanceID);

float3 interactorFwd;
float blend;
if(CalculateInteractorForward(instanceID, o.posOS, interactorFwd, blend))
{
	fwd = lerp(fwd, interactorFwd, blend);
}

ApplyLookAtTransformation(o.posOS, o.normal, fwd);
Wind
For wind swaying I chose to use the simplex noise library by Ashima Arts and Stefan Gustavson which was ported to HLSL by Lex-DRL in this Unity forum thread. 3D sampling the noise makes the wind look rather realistic (in my opinion) by having gusts moving through the grass. I calculate the strength of the sway with 2 "octaves" of noise sampled by the instance point position. This is then multiplied by the vertex's Y position squared, which holds the base of the grass in place and makes it sway exponentially stronger the higher the vertex.
Randomized height
Height of the blades is randomized by scaling vertically with simplex values sampled with the instance point position. Range of height can be configured in the inspector of Grass.cs.
Cel Shading
My cel shading implementation is a simple texture used to mainly ramp the additional lights. Main lights color is just applied universally because of the billboarding. You can find the lighting functions in GrassHelpers.hlsl.
Credits
Wes Aarntzen for the great example texture he whipped up.